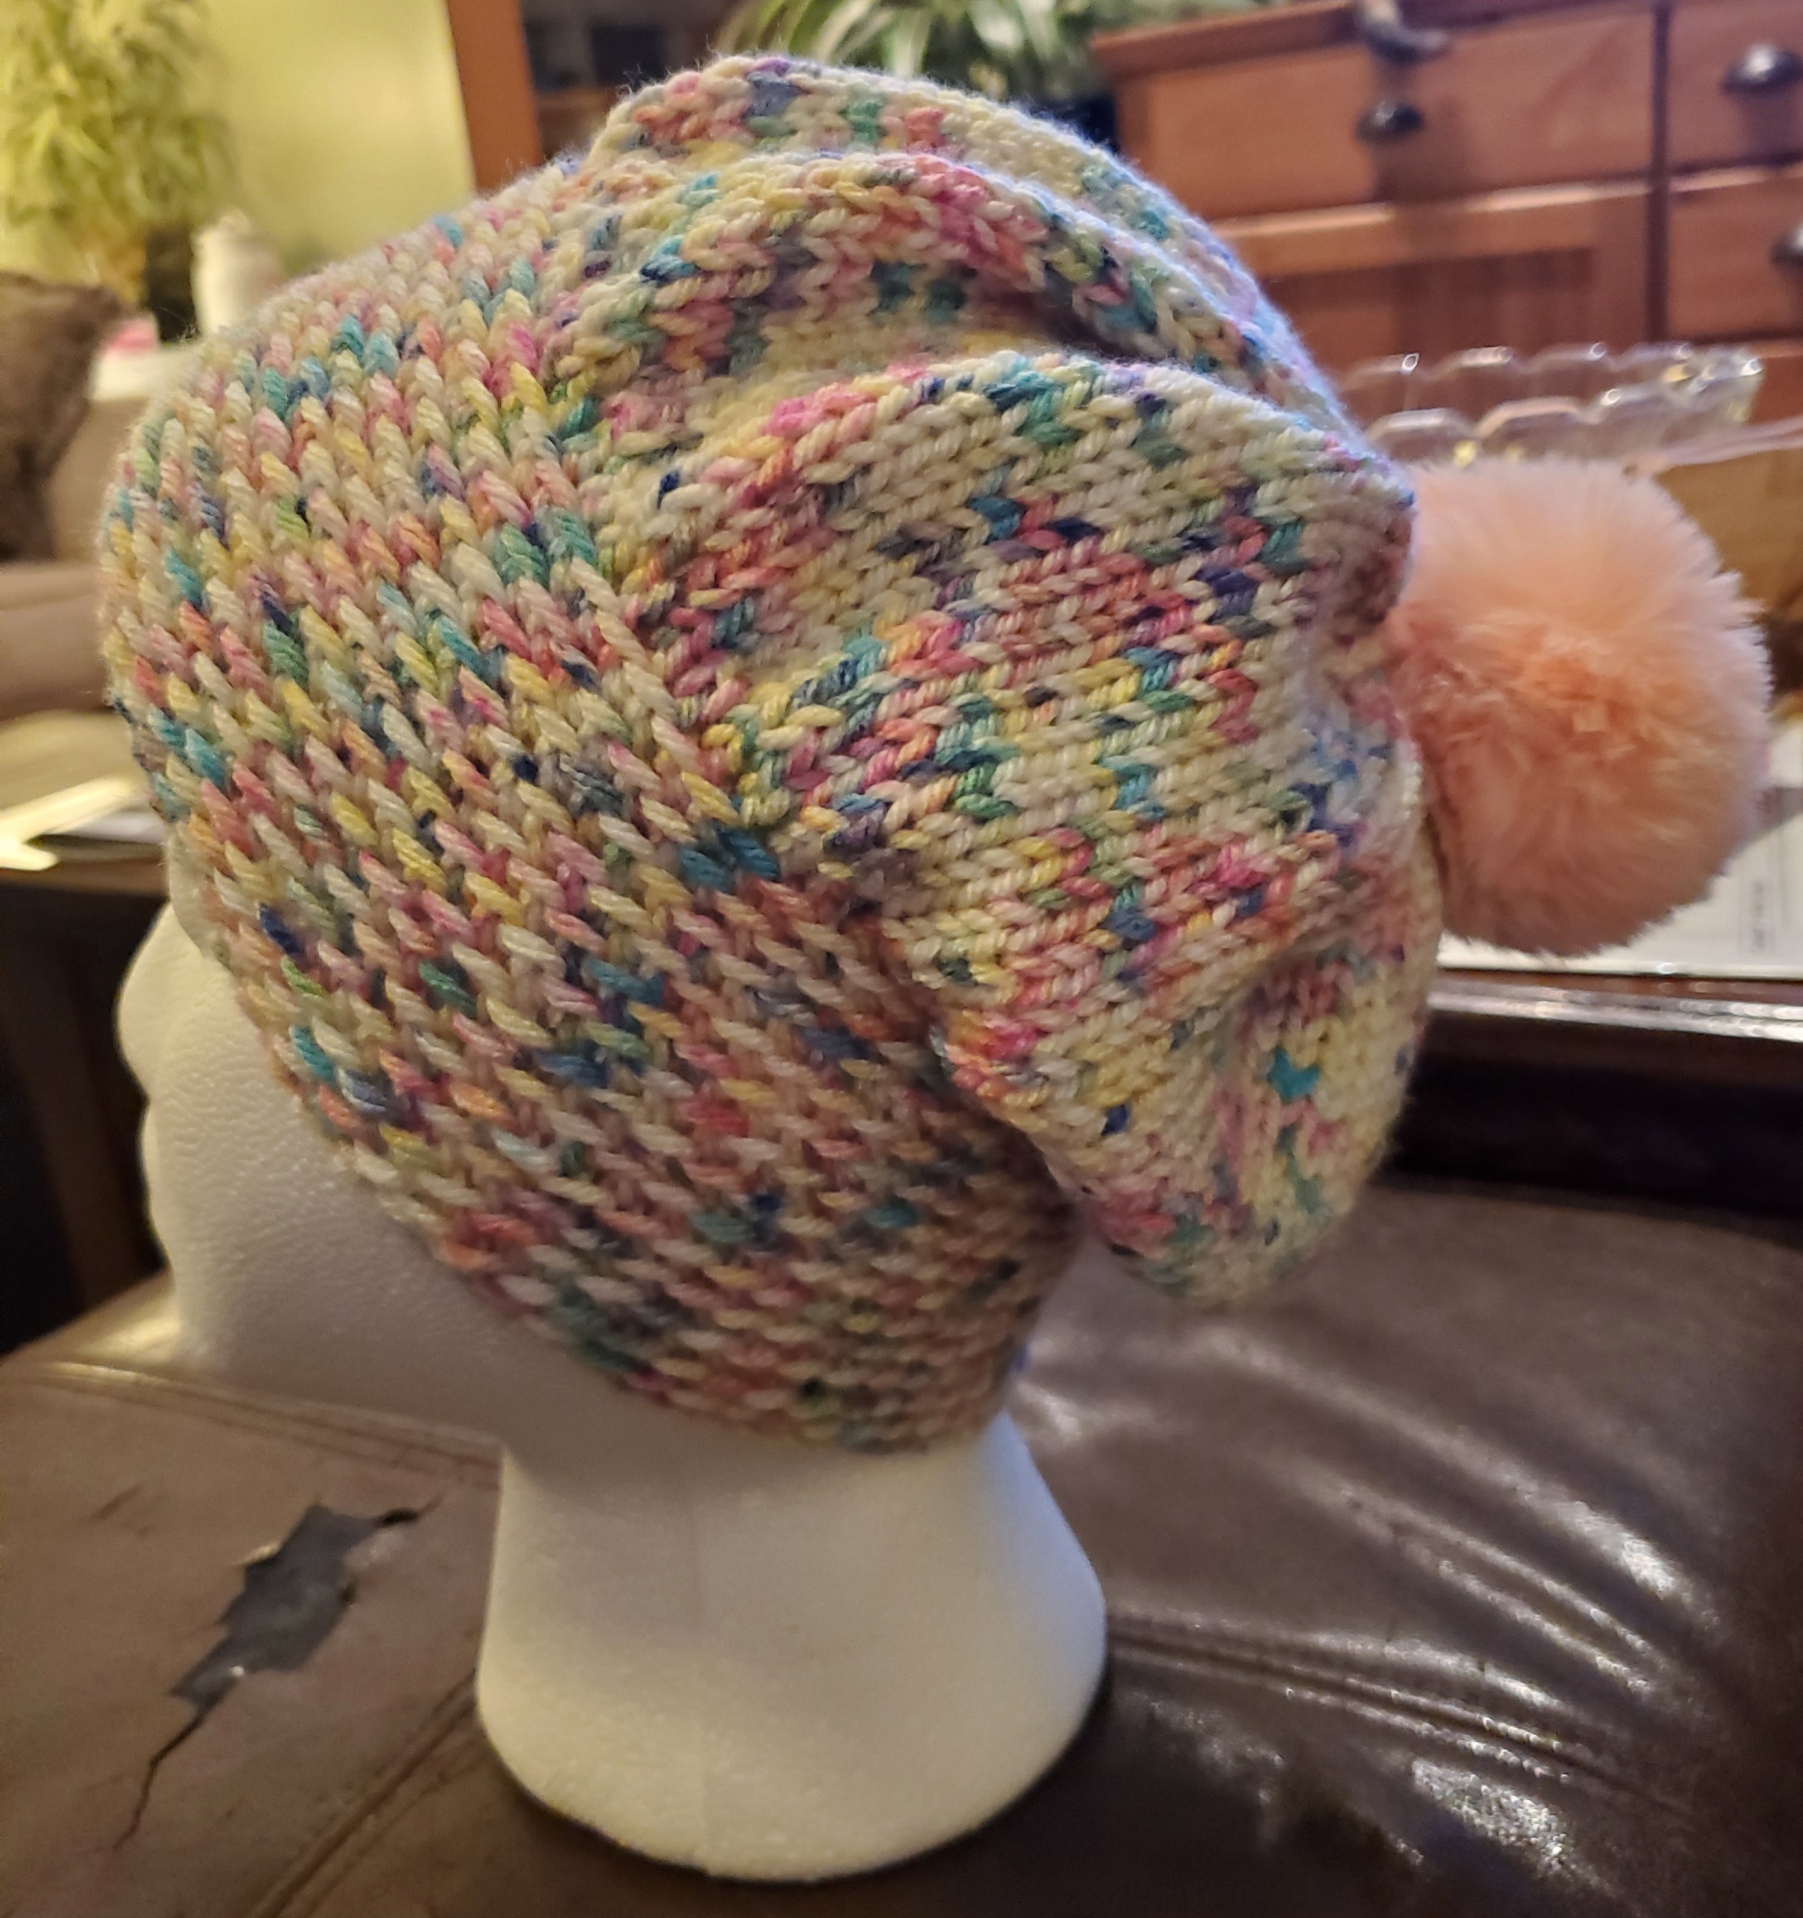
What I enjoy most about this yarn is that every project turns out a little different. The color changes create interest without needing complicated stitch patterns. The yarn itself becomes the star of the project.
A PLACE TO SHARE A PLACE TO UNWIND ... dedicated to all of us kindred spirits who like to knit, to crochet, and make new friends.
June 4, 2026
What I enjoy most about this yarn is that every project turns out a little different. The color changes create interest without needing complicated stitch patterns. The yarn itself becomes the star of the project.
September 29, 2024
I just finished making another beret, this time sized for a child or young adult. What I love about this design is that the ribbon can be flipped, giving the beret a different look. It’s a fun and versatile piece that can easily match different outfits!
September 22, 2024
Colorful Cotten with Hand-Spun Wool Beret
September 16, 2024
Tam/ Beret with Flowers
September 9, 2024
A Cozy Knit: Tam/Beret
The pattern is written in plain English, making it user-friendly and easy to follow. I chose to use Lion Brand’s Pound of Love yarn in the vibrant color Cherry Cerise, which added a lovely pop of color to my project.
I went with size 6 for the needles, and the result is a beautifully crafted Tam with a French-inspired look. It’s perfect and has a stylish flair to any outfit.
May 4, 2024
Yarnology I cord tool.
Utilizing the Yarnology tool, I just finished crafting a new I cord, this time incorporating a delicate lace stitch to fashion a stunning beret.
April 30, 2024
A new adventure in knitting...
... began with discovering a small but powerful tool - the Yarnology I-cord maker. Loraina, a knitting group member, demonstrated its capabilities, and I was immediately intrigued. Recognizing its potential to speed up creating an I-cord, I wasted no time purchasing one from Hobby Lobby.
With my new gadget, I began a project to knit a beret, starting with an I-cord rim. After some trial and error, I discovered that using sock yarn was the key to success. With the I-cord complete, I picked up enough stitches for a 60cm circumference and began knitting in the round.
I incorporated a color pattern using red heart sock yarn in off-white as I worked. However, I soon realized that the I-cord alone did not create an appealing hatband. I used a second circular needle to create a K1, P1 stitch combination for a 1950s-inspired seed stitch border to remedy this.
I fashioned a small bow from the remaining inches of the I-cord on the hatband to add a finishing touch.
To finish the beret, I decreased the number of stitches in each round until only eight remained, cut the yarn, and left about seven inches. Then, using a large sewing needle, I pulled the yarn through the remaining eight stitches, fastened the stitches, and weaved in the rest of the yarn so that the stitches were secured and not open. My beret is complete.
And with that, my new gadget led me on a creative journey to a beautifully crafted accessory.
April 27, 2024
AraucanÃa Atacama and Schachenmayr Nomotta Yarns
I also used Schachenmayr Nomotta Extra as a complementary yarn. Schachenmayr yarn hails from Germany and is crafted from 100% Schurwolle (New Wool). It requires needle sizes 4 and 5 and produces 24 stitches per 10 cm.
Both yarns have their unique qualities, and I appreciate the creative possibilities they offer.
April 15, 2024
Red Slouchy Magallanes Beret Sirdar Escape DK
Escape DK is perfect for a variety of projects, from cozy sweaters to accessories. As you knit, you’ll enjoy the subtle stripes and the vibrant interplay of colors. Let your creativity flow with this versatile yarn!
February 9, 2024
Beret # 3 Color "Amber Honey"
I knitted this beret during last week's knitting and crochet gathering at Azusa Senior Center. I love how quickly small projects like this can be completed.
January 30, 2024
Beret #2
I created a project during my flight back home from Germany. It helped me kill time and avoid boredom during the long plane ride. When I shared it with my friend Jean, she suggested that her niece would look adorable in it. Later, I posted a photo of the project on my Facebook page, and Anne, another friend, loved it so much that she asked me to make one for her granddaughter, Sydney. I was happy to do it.
January 28, 2024
Knitting Project Beanie with Furballs.
When I returned from Germany on the 3rd, I was rather sick and didn't have much energy to do anything. Two weeks later, I am feeling better and have started knitting a beanie for a little girl. The yarn I used was purchased at Hobby Lobby and is called "I love this Yarn."
January 23, 2024
September 6, 2023
Beret
BERET:
With size US 6 (4mm) needles, CO 92 sts. Join in the round being careful not to twist sts, and place marker for beginning of round.
Rounds 1-10: *K 1, P 1, rep from * around.
Round 11: *K 1, KFB, rep from * around. (138 sts)
Change to size US 7 (4.5mm) 16”/40cm circular needles.
Round 12: K around.
Rep round 12 until work measures 5.25”/13cm from cast on edge.
Begin decrease round for crown shaping (round numbers restart for simplicity), and change to double pointed needles when necessary:
Round 1: K 10, S2KP, *K 20, S2KP, rep from * to last 10 sts, K 10. (126 sts)
Round 2: K around.
Round 3: K 9, S2KP, *K 18, S2KP, rep from * to last 9 sts, K 9. (114 sts)
Round 4: K around.
Round 5: K 8, S2KP, *K 16, S2KP, rep from * to last 8 sts, K 8. (102 sts)
Round 6: K around.
Round 7: K 7, S2KP, *K 14, S2KP, rep from * to last 7 sts, K 7. (90 sts)
Round 8: K around.
Round 9: K 6, S2KP, *K 12, S2KP, rep from * to last 6 sts, K 6. (78 sts)
Round 10: K around.
Round 11: K 5, S2KP, *K 10, S2KP, rep from * to last 5 sts, K 5. (66 sts)
Round 12: K around.
Round 13: K 4, S2KP, *K 8, S2KP, rep from * to last 4 sts, K 4. (54 sts)
Round 14: K around.
Round 15: K 3, S2KP, *K 6, S2KP, rep from * to last 3 sts, K 3. (42 sts)
Round 16: K around.
Round 17: K 2, S2KP, *K 4, S2KP, rep from * to last 2 sts, K 2. (30 sts)
Round 18: K around.
Round 19: K 1, S2KP, *K 2, S2KP, rep from * to last st, K 1. (18 sts)
Round 20: K around.
Round 21: S2KP around. (6 sts)
Round 22: K2tog around. (3 sts)
Begin i-cord loop:
Do not turn. Slide the 3 sts to the other end of the needle. The working yarn will now be at the bottom of the sts. Knit the 3 sts, bringing the working yarn up the back of the work. This is essentially connecting the last st of the previous row to the first st of this row.
Slide the sts to the other end of the needle again and knit the next row, bringing the working yarn up the back of the work.
Continue in this manner, sliding and knitting until the i-cord measures approx. 2”/5cm.
Cut yarn and thread tail onto tapestry needle. Draw tail through sts, removing needle, and pull like a drawstring to close hole. Thread tail through top of hat to interior and knot to secure to form a loop.
Secure and weave in all ends.